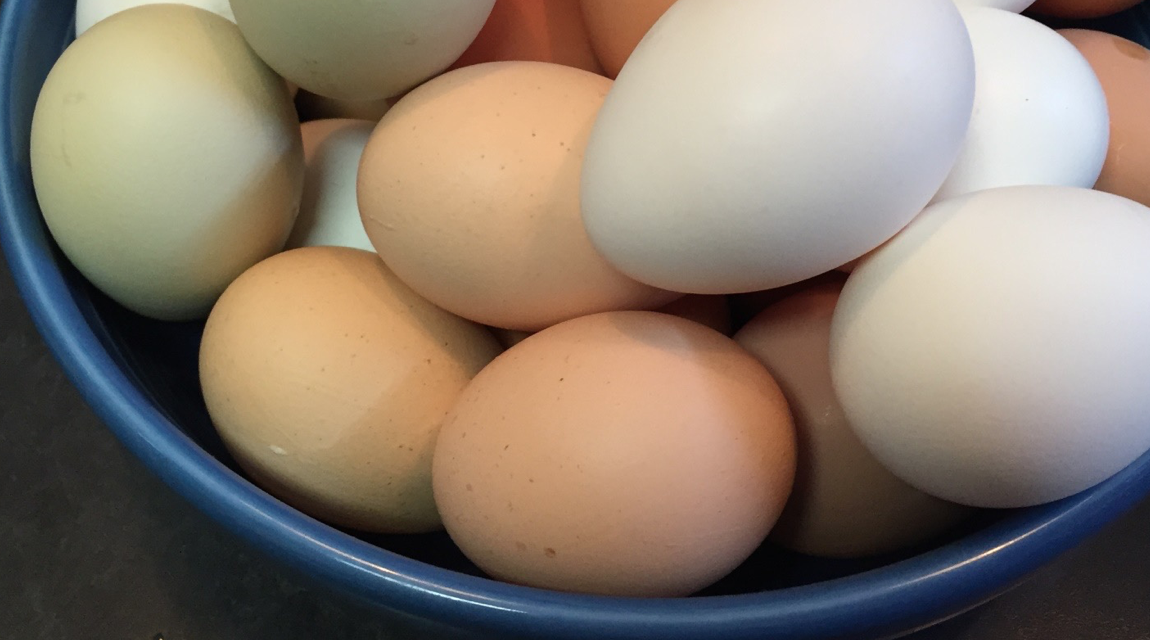
Spring is a wonderful time for chickens! The cold weather is behind them and they are ready to supply you with an abundance of eggs. So what do you do with all the extra eggs? You can freeze eggs or dry some in your dehydrator. Buchheit has a variety of different brands of dehydrators.
How about baking? That can use lots of eggs. I like to bake up some treats when the weather is cool and fill my freezer with treats to use in summer when I don’t want to turn on the oven.
Let’s make a homemade angel food cake. Most bakers never try a homemade angel food cake as it looks intimidating. But with a little help from me today they’ll be quick and easy to make.
Making a light as a feather, melt in your mouth angel food cake is an art form of which my mother was a master. While I make a great cake, our mother’s torch has been passed to my sister, Ellen. Ellen entered our mother’s angel food cake in her honor and won the first place blue ribbon with her first attempt! We were all so proud of her.
How you get to blue-ribbon status is starting with the first try. That holds true for many skills we need to learn to be successful. The trick to a great angel food cake starts with farm fresh eggs. If you can’t find any, make sure to check the side of your store bought eggs for the shortest Julianne calendar date when buying them. Here is my favorite recipe for Angel Food Cake. I found it in an old cookbook.
Foolproof Angel Food Cake
10 inch tube pan
Preheat oven to 325 degrees F
Baking time about 65 minutes
Ingredients:
1 ½ cups cake flour, sifted before measuring
2 cups sugar
1 ½ cups egg whites
½ teaspoon salt
1 ½ teaspoon cream of tartar
1 ½ teaspoon vanilla
1 teaspoon almond flavoring
The trick to this cake is getting all the ingredients lined up before you think of turning on the standing mixer. In the middle of whipping the egg whites is not the time to forget a step and try to re-read the recipe. Please don’t skip the step where we do lots of sifting of the sugar and the flour together. The folding step is where the cake may get tough so having the sugar and flour pre-sifted makes a difference. This will be fun! Let’s hit the kitchen!
This cake requires that all utensils, the beaters and bowl be completely free of any oil or fat so I always re-wash all my tools before I start. Any residue can cause the egg whites to not whip up as high as needed.
 Sift the flour once, then measure 1 ½ cups and set aside. Measure the sugar into 1 cup portions. Take one cup of the sugar and add to the flour and sift the two ingredients 4 times. I know it’s tedious but do it 4 times. I leave this blend on my counter where I will be doing the final step of adding the flour/sugar mixture to the stiffened sweetened egg whites.
 Pour the 1 ½ cups of egg whites and the ½ teaspoon of salt into the clean standing mixer bowl. I have the flavoring and sugar near the mixer along with my measuring spoons. Now we are ready to start the actual mixing of the cake. The prep for this cake takes much longer than the actual assembly but it’s worth it once you taste it.
Now let’s start mixing. Turn the mixer on and beat the egg whites and salt until foamy. Add the 1 ½ teaspoons of cream of tartar. Continue beating until mixture is stiff but not dry. That’s when the egg whites have a sheen to them and when you stop to check them, they form stiff peaks.
 Turn the mixer to low speed and slowly add the 1 cup of sugar only 2 tablespoons at a time.
Add the flavorings of 1 ½ teaspoon vanilla and 1 teaspoon of almond flavoring.
 Then stop the mixer as the rest is done by hand.
Now remove the mixing bowl from the unit and move to the countertop with the flour/sugar mix. I use an antique tool that was designed just for this cooking task but you can use a spatula instead.
Use a spatula to fold in the flour/sugar mixture into the egg whites slowly, again only 2 tablespoons at a time. Fold in with slow, careful folding strokes. What you are trying to do is incorporate the flour/sugar mixture into the egg whites without losing the loft formed when you beat the egg whites. This takes practice but it you don’t try you will never perfect your techniques. You can do this!
 After you have all the flour/sugar mixture folded into the egg whites, I always give it several slow folds for good measure. Carefully pour into an ungreased pan. You can use bread loaf pans but the best is the 10 inch tube cake pan available at the larger Buchheit stores.

 Cut down through cake batter with a silver knife to remove any large air bubbles. I don’t have a silver knife so I just use a clean thin knife instead. I start at the center of the tube and slowly move my knife up and down as I turn the cake pan around. My mother did it that way so it’s now a tradition.
 Bake for 55 minutes and check. Insert toothpick into center. If it comes out clean then remove the cake from the oven. If in doubt, bake longer. If the middle is not set, when you invert the cake, the middle will fall onto the counter. Ask me how I know!
 When cake is removed from the oven, invert onto a glass soda bottle or wire cake cooler until cold. Then take a thin knife and go around the outside edge of the cake pan and the inside edge of tube. Then place the cake over a cake plate and cut around top of the cake pan insert.
 A classic angel food cake stands alone with no frosting. It’s great to pull one out of the freezer during strawberry season to use instead of shortcake or try with sweeten real whipped cream.
 Please use up some of those eggs all your hens are laying with this great recipe.
If you would like to post a photo of your cake go to the Photo Barn on Buchheit’s website. Hope this was helpful! Can’t wait to hear from you! Be blessed. Anne May


Thank you, thank you for your blog on the Angel Food Cake. 😀.
I made one from scratch as a freshman in high school for a benefit, we needed a certain number so everyone made some and the remaining few where store bought. My mom stated, it was pretty, darn good that my cake was taller then the store bought ones!! As I started to read I thought to myself, “oh, I don’t even remember what all you have to do!” Your story brought back such great memories! Right down to the tear in my eye, when your picture of the tube pan matched my mom’s. ❤️I think I made 1 more since that time, since I am more of a pie/cookie girl. ☺️
My mom has been gone 2 years now but reached the age of 84! 3 of her older sisters are still going, the oldest at 92! I’m proud to say my son owns the family farm now, dating back over 160 years!
This is the first time I have seen these blogs and love them! I went backwards and read them all! Thank you again and I look forward to the future ones,
Sincerely, Stacey White