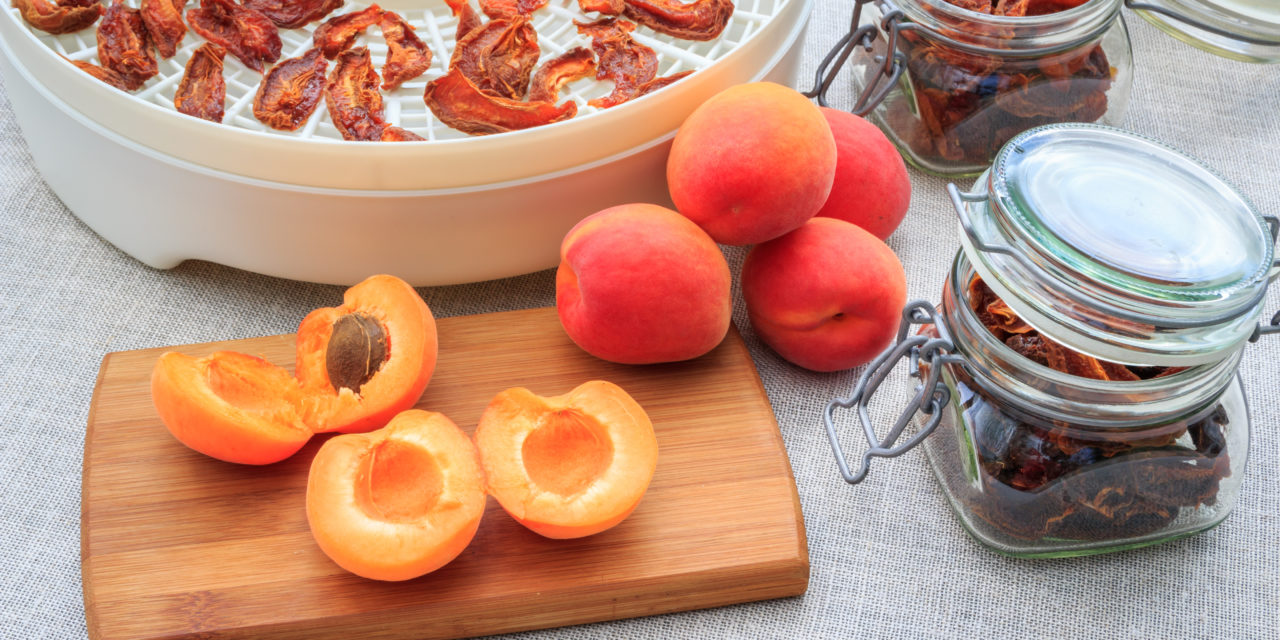
Drying vegetables, fruits and herbs is one of the oldest methods of preserving the harvest. The faster food can dry without actually cooking, the more favorable will the results be when reconstituted for cooking. Since we live in a humid climate, the best method for drying foods is with a dehydrator.
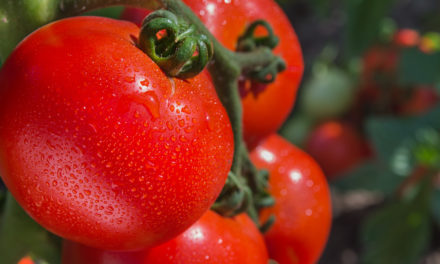
The finished product will only be as good as the ingredients used at the start so please use only the best, freshest 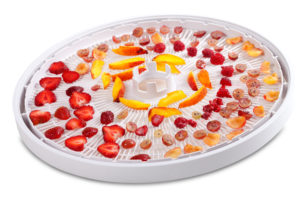 foods. Save the over-ripe fruits for fruit leathers.
During the process of dehydration all the moisture is removed from a food and the growth of organisms that spoil the food are stopped. Only in an environment that has sufficient water to support them can bacteria, molds and yeasts grow. Properly dried fruits have 80% of their moisture content removed and it’s 90% of the water removed for vegetables. When the techniques of drying are accomplished correctly the home-dried foods will keep for 6 months to 2 years; but it is vital to remember the cooler the storage temperature the better. Food kept at 70 degrees will not keep as long as food stored at 50 degrees, but resist storing in the refrigerator.
Do not use blemished fruits and vegetables. Save the over-ripe for sauces or to make fruit leathers.
The smaller the pieces of food, the less time it will take to properly dry them. Uniformity in the pieces will help assure that they will all dry at the same rate.
Blanching, which heats the foods without actually cooking it, deactivates the enzymes that cause food spoilage. In dehydration, the only method recommended is steam blanching. Go to Blanching Blog at the Buchheit’s website for more details.
Some books recommend dipping fruits into a prepared solution to promote good color retention. Fresh fruits start to brown (oxide) as soon as the air hits it. Think of brown apple slices or peaches turning colors as they wait for the canner. I don’t dip most fruits. If you choose to there are several choices for dips:
- Ascorbic Acid (Vitamin C) used for all fruits
- Honey used for Bananas, Peaches, and Pineapples
- Juices (Pineapple & bottled lemon juice) for Apples, Bananas & Peaches
- Pectin (and sugar) used for Berries, Cherries and Peaches
- Salt (pickling salt only) used for all fruits
Dips are only partially effective as steam blanching for both fruits and vegetables is by far the best way to preserve color.
Pasteurizing: Another feature of using a dehydrator is it lessens the need to pasteurize your dried food. Since outdoor and oven-drying is less exact, pasteurizing (placing dried foods in freezer set at zero degrees for 2 to 4 days) is recommended. It kills any insect eggs or organisms that cause spoilage, allowing foods to be stored longer. When using a dehydrator a constant temperature ensures a great finished product.
Ziploc Test: when you are testing foods to see if they are dried, the Ziploc test helps to check for the presence of any moisture. Put a test sample of the dried food into a Ziploc storage bag and wait 10 to 15 minutes. Check bag. If any droplets of water have collected on the top of the bag, you know that the food needs more drying time and you return the sample to the drying trays.
Case Hardening: While drying foods is a very simple method, there are still challenges. One of them is called case hardening. This is when the outside of the fruit will toughen before the inside is dry. Not only can this drastically slow down the drying time, it can threaten the quality of the finished product. Case hardening can create the same kind of anaerobic (non-oxygen) nonacidic environment that can lead to botulism in canned goods. The simplest way to avoid case hardening is to follow the directions for the temperature and time requirements set by the manufacture of your dehydrator. Low slow drying works well!
Checking or crazing fruits: some waxy fruits like cranberries and blueberries and grapes have such tough skins that without bursting the skin, case hardening will be difficult to prevent. Methods of checking include cutting with a razor blade the top of grapes for example, or pricking the skins of blueberries. Plunging the fruit into boiling water for 1 to 2 minutes and then an ice-water bath is called crazing. While blanching seems counter-intuitive, this step is often necessary to soften the skin, making it more air-permeable.
Jerky: Jerky is raw meat or fish or poultry which is salted or marinated then dried. Beef jerky is the easiest to make with the most reliable results. Choose only the leanest cuts of beef. Freeze meat slightly to aid in slicing. Cut beef into strips ½ inch thick across the grain for a tender slightly brittle finished product. Cut with the grain for a chewy texture.
The meat must be “cured” that is, treated in such a way as to prevent spoilage. Either dry cures like salt and seasonings rubbed into the meat or brine cures which are marinades or liquid seasoning mixtures in which the meat is soaked for a period of time. Buchheit carries pre-mixed rubs and brines for jerky. Set the dehydrator at 145 degree F, and bring jerky to an internal temperature of 160 degrees F.
Store jerky in mason jars or plastic container. Check jerky stored on shelves for weeping. Weeping is any moisture from water, brine, marinade or fat that appears on the surface of the jerky. If weeping appears dispose of jerky.
Store It!
Packing and Storing: Light, moisture and air are hard on dried foods necessitating storing them in a dark, cool, dry place. Avoid the refrigerator which is too moist. Fill Mason jars and clean Ziploc bags or, for even better results, use a Food Saver for many items. I wouldn’t recommend them for chewy foods like pineapple as the vacuum seal process forces all the pieces to merge together. Place the jars and bags into a brown paper grocery bag to protect them from light. Make sure to label all containers carefully with the contents and the date. Rotate your stock, using the oldest package first. Store in a cool, dark place.
Eat It!
Rehydrating: To rehydrate dried produce, you can cover it with boiling water and allow the food to steep for several hours to absorb the water, then cook the produce in the soaking liquid. Since vegetables have lost more of their water content to dehydrating they take longer to rehydrate than fruits.
I use most of my dried foods in soups and stews and chili thoughout the winter so I rarely rehydrate food prior to cooking. For example, I love to add dried onions directly to ground beef when cooking up a skillet of beef crumbles. Since I almost mince my onions before I dry them they are quick to plump back up. So quick and easy! Just like dried peppers I add to scrambled eggs, just toss them into the skillet with extra virgin olive oil, dried onions and spinach or kale to make a healthy omelet fast.
Fruit Leathers are a pureed fruit which is dried and rolled into a chewy fruit taffy. They are a great take-along snack that is a nutritious alternate to junk foods. Bananas are a wonderful creamy addition to fruit leathers. Pack dried fruit leather rolls in home canning jars or vacuum package.
Annie May’s Beef Barley Vegetable Soup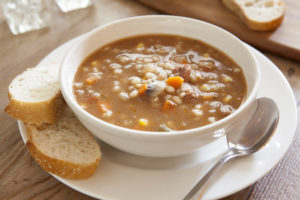
Into large stock pot combine:
3 to 4 meaty soup bones
2 to 3 quarts of homemade tomato juice
Water to fill pot to just past half way mark
4 dried bay leaves, pepper and just a little sea salt
In large cast-iron skillet “sweat” celery, onions, carrots and cabbage if using fresh. If using dried add to pot any combination of soup vegetables that suits your fancy. I use dried okra, cabbage, onions, celery, carrots, green beans, eggplant, zucchini and dried potatoes
Cook soup on a cold winter day for hours uncovered. Don’t cook the stuffings out of it, just simmer it gently. Add more tomato juice or sauce to taste. After about 5 hours, pull the bones out and cool. Remove the meat and shred it. I like meat in every spoonful so I dice it up and I pull the marrow out of the bones and add it back in to stock. Last half hour turn heat up to medium-high to bring to just boiling, hot enough to cook thin egg noodles and barley you add now. Watch it so that the noodles and barley doesn’t burn.
Soup is done when noodles are to your liking. Serve with fresh baked whole wheat bread and butter (no cheap margarine, it’s not healthy)
Allow soup to cool and transfer to containers for freezing or giving away. No need for lots of extra seasoning as you want the vegetables to sing a duet with the good beef stock.


how do you use the dehydrated squash?
You can rehydrate it in a crock pot set to the lowest setting, takes a while but plumps up well but squash will never get firm again. Remove from liquid and add to stir fry or serve with seasonings and butter. I use mine mainly in soups and stews and I toss some into potato casseroles using 1/2 cup dried.
We like to sprinkle salt on the dehydrated squash and enjoy as a snack, sort of like a veggie chip. Another option is to add the squash to vegetable soup. If you have sliced dehydrated squash, you can re-hydrate and use for stir-fry.
I WILL HAVE TO TRY THAT